
Nikole and Clark Stone here! In this post, we will be showing you how to convert a Ford Transit Connect High Top into a camper van!
Do you want to have a life traveling around in a van? Are you on a budget and can’t afford an elaborate van build? Well, the Ford Transit Connect high-top camper van is perfect for you! It is one of the cheapest builds, and easy to maintain!
Here is how we converted our high-top Ford Transit Connect, but first let’s go over in more detail why you should convert this specific vehicle into a camper van.
Why is the Ford Transit Connect High Top Good for Vanlife?
This post may contain affiliate links, which means I’ll receive a commission if you purchase through my links, at no extra cost to you. Please read full disclosure for more information.
First, here are all of the items in a chart that we have decided to talk about in this post.
Today we will be showing you our full Ford Transit Connect high roof conversion. First, let’s talk about why we decided to travel with this particular camper van, and why you should consider traveling with it too.
Traveling has always been one of our favorite hobbies. The only downside to having any hobby is… the expenses. Hotels, gas, food, and flight tickets all add up to be a pretty penny.
So, we decided to look into cheaper ways we could travel. Hotel costs and flights are the bulk amount of anyone’s travel bills. Purchasing a Ford Transit connect campervan was one of the best ways to save on money. This solved both hotel costs and expensive flight tickets.
Of course, we couldn’t find a van already built for the price range we were looking for. Sprinter vans and Mercedes were way out of our budget range. That’s why We decided to go with a used Ford Transit.
Now I will be going over how we gutted and built our campervan! Hopefully, this helps when you decide to purchase and build a van of your own.
Purchasing a van to Convert into a Campervan
Checking for Vehicle Damages
The purchasing process was the hardest part of our van build. I can’t tell you how many sketchy dealers and private owners we had to go through. If you are looking for a used van, get it checked out by a mechanic even if everything looks okay.
There are a few things you can look at to initially see if the vehicle is even worth purchasing. I will list the things we would look at below.
- look under the van to see if anything is leaking.
- open the hood and look for rust/ listen for any hissing sounds (could mean a leak somewhere).
- Check the oil level.
- test out the breaks, heat, air, horn, signals, and how it sounds when it’s idle.
- check the roof for water damage
There are probably more things that one would need to check (that’s why you take it to a mechanic), but these are the things we checked out before we purchased our van. You would be surprised at the damages people try to hide.
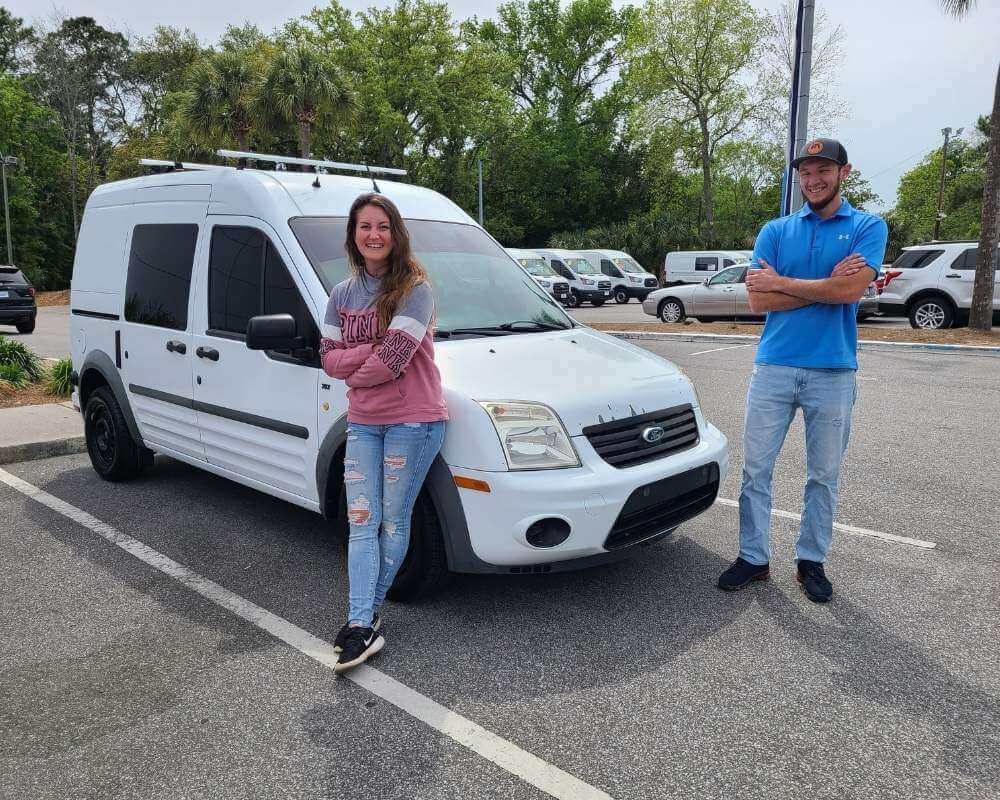
Final Purchase
When it came time to finally buy one, we drove about 4 hours to the South Carolina coast and bought our 2013 Ford Transit Connect high top at a Ford dealership. $11000 is what we paid for our little cargo van.
We wanted that specific one because that was the last year Ford built transit connects with that high of a roof. Also because of the roof rack, tinted windows, and overall good working condition. Read more about why we chose the Ford Transit Connect here.
Before You Start your Ford Transit Connect Camper van Conversion
Here are a few things you should consider before diving into your campervan build.
Weight: When purchasing lumber for your van, keep in mind the weight you will be putting on your van. Take any chance you can to purchase lighter weight without compromising the durability of your build.
Floor Plan: To prevent backtracking during your van build it’s a great idea to have a floor plan. Even if you have a rough sketch of what you want, you will still have an idea of how it will turn out. Know exactly where your kitchen will go, and where your bed will go.
We messed up a few times because we didn’t really have a plan. Because of this, it took us about two weeks of deciding what to do with the walls.
Wiring and insulation: Don’t forget the wiring and insulation that goes BEHIND the ceiling and the walls. If you do forget, you may have to backtrack or have your wires hanging out in an unappealing way.
If you want a whole wired light system, make sure that goes up before you build on the walls. Thankfully we stuck with the RBG lights which required very little lighting installation.
Windows and Doors: Be aware of what purpose your windows and doors will serve. For example, we have one side of the bed nailed to one side of the van, and will never move. Our bed slides up giving us better access to the other door.
Tearing the Ford Transit Connect High Roof Apart
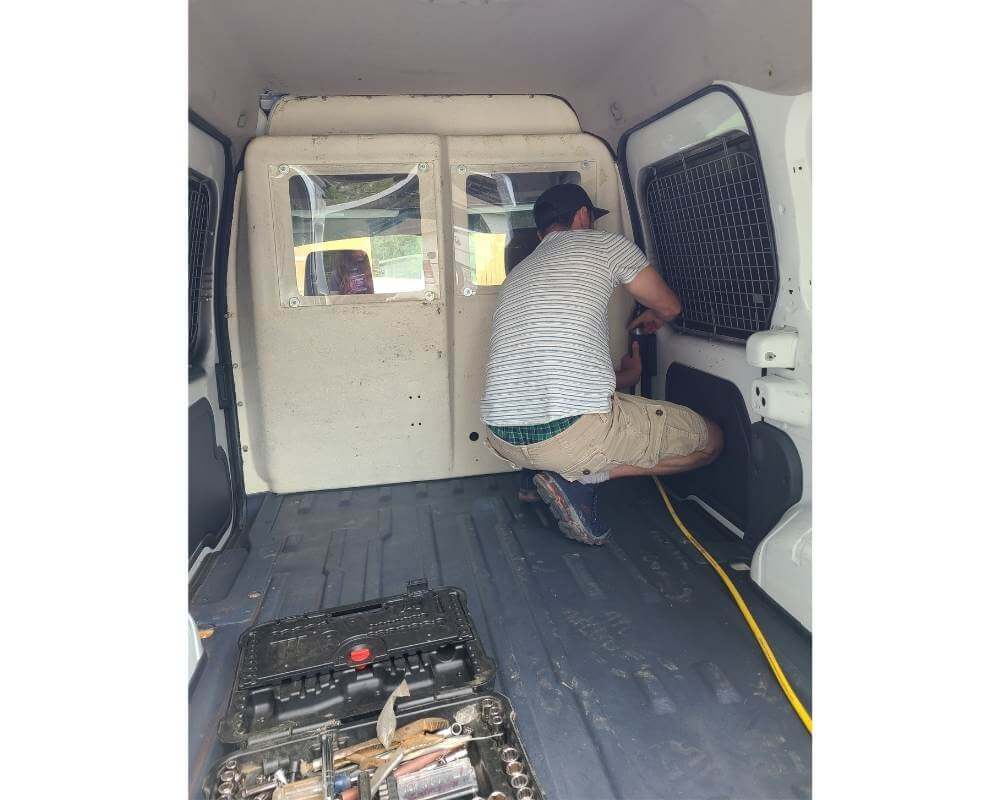
We started on the Ford Transit connect conversion by tearing things out that we didn’t need (destruction is always fun).
Tearing the shield that separated the front from the back was first on the agenda.
Then we moved to the floor and ripped out the Black rubber matt.
The “cage” like coverings on the side windows were also removed with a drill. Thankfully the windows were already blacked out, which means we didn’t need to find extra curtains.
The ceiling of the van was a bit challenging because of the lighting. We didn’t want to mess it up so I had to hold the piece for the ceiling while Clark popped out the two lights. Then we were able to rip the whole ceiling down.
All together this probably took a good 2 to 3 hours.
Building the Van From the Bottom Up
We decided it was a good idea to start from the bottom of the van and work our way up. We wanted the walls to be sitting on top of the floor, and the ceiling to meet up perfectly with the walls.
Items Needed and Cost: Prices will vary depending on where you live and when you purchase. We purchased most of the supplies at Lowes.
- 1/2 inch Insulation board $15
- 4 1x2x6 boards $12
- Peel and stick tiles $30
- Plywood (free, we had it laying around in the garage)
- Bulletin Board Paper $12
The Build:
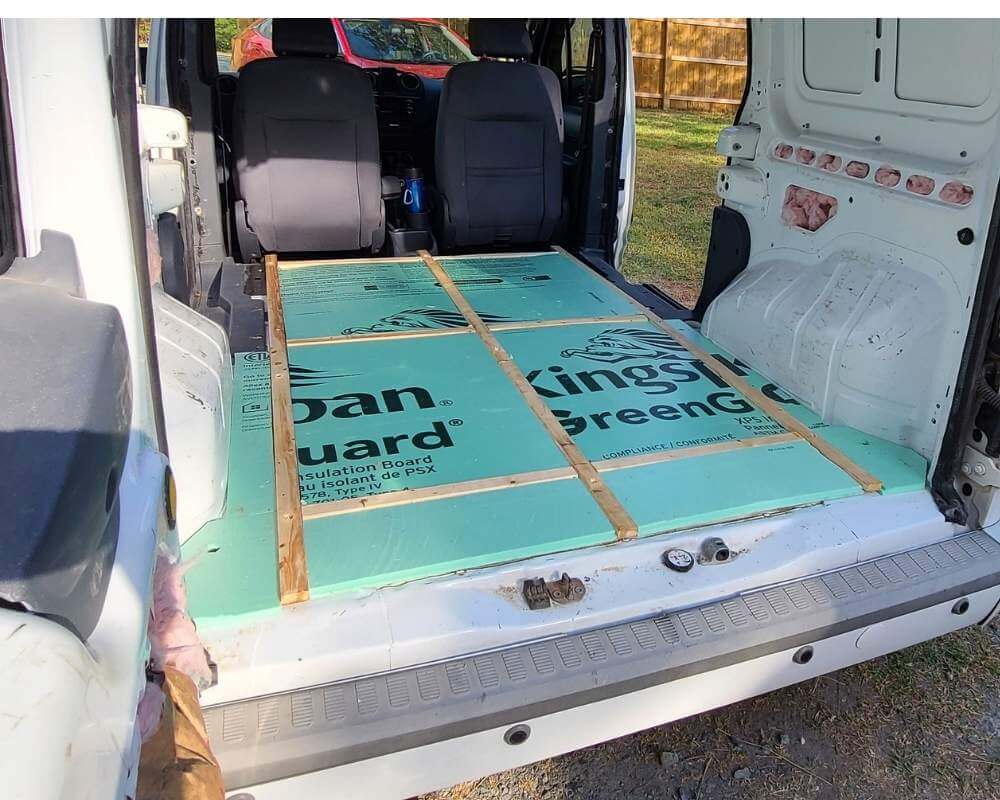
We started off by cutting the 1x2x6 boards so we could section off the platform to fit four main pieces of insulation board (and a few extra small pieces) between them (pictured above). We had to use the board pieces so the main flooring would have a structure to sit on.
Later we learned that insulating the floor like this won’t give you much benefit. We should have taped where the wood pieces were and on the walls to create a vapor barrier type deal. You can read our post about camper van insulation if you would like to learn more about the topic.
If you don’t already know insulation board is fairly flimsy and can break if stepped on.

Once the insulating was done, we cut out the floorboard from plywood. We cut around the wheel wells and left room for the steps under both of the sliding doors.
The back doors also needed to shut with ease so we closed the doors, so we measured from the front seats to the back doors.
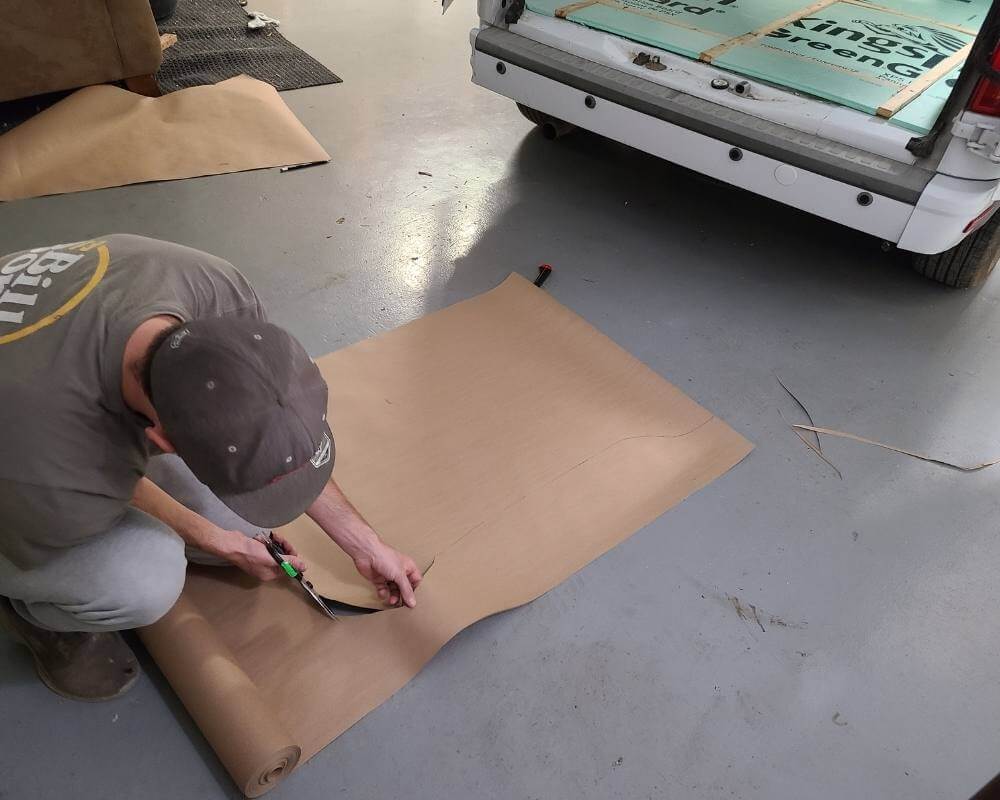
In order to get an accurate cut around the wheels, we used bulletin board paper to make a template. We laid the template on the plywood and cut it out. Then we screwed the plywood into the 1x2x6 boards.
It was super important that we didn’t use boards that were too thick, or it would compromise with the headspace above. No, you cannot fully stand up in a Ford Transit Connect high-top camper van, but we were thinking about having room to sit up on our bed.
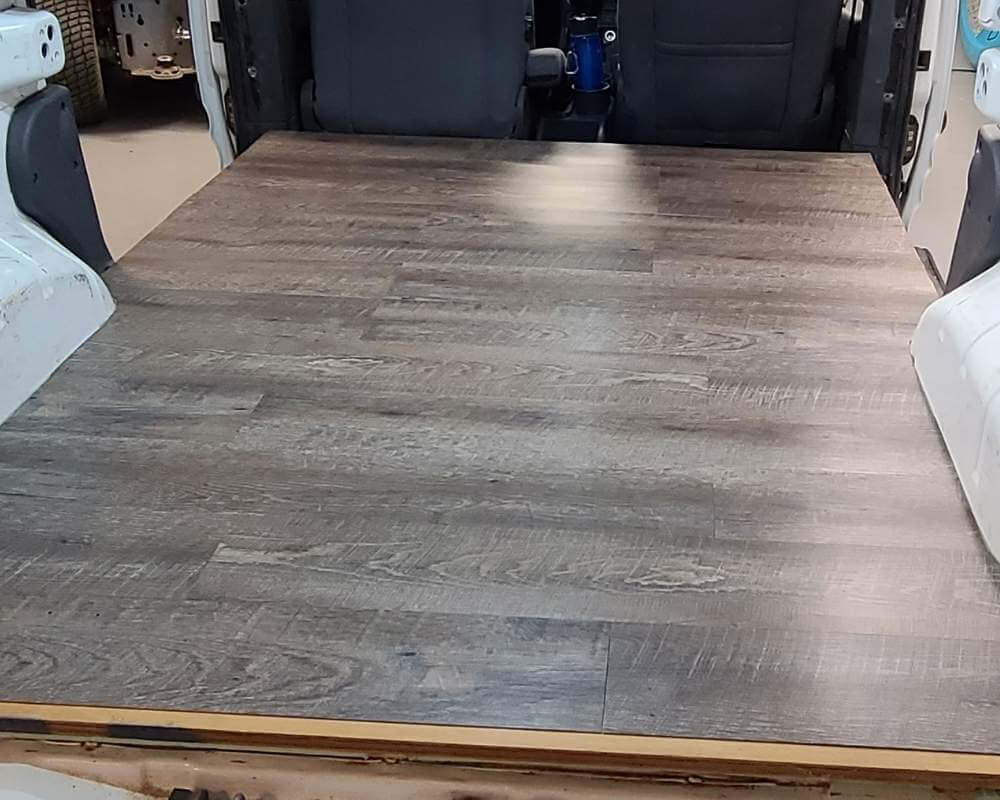
The peel and stick tiles were leftovers from a bathroom we remodeled. Placing the tiles on the floor was the easiest task yet. We are still a bit iffy about this kind of flooring because of the items we will be sliding across it. So far it has held up fine.
How Long it Took:
We worked on the flooring of the van on and off for two days. It took a total of 7 hours to finish.
The Walls for Our Ford Transit Connect Camper Van
Items Needed:
- Wall Paneling $60
- Fiberglass insulation $15
- Glue M3 adhesive $15, and liquid nails $7
- Wall reflectix $13
The Build:
When starting this process we knew we wanted great insulation to keep warm in the winter and cool in the summer.
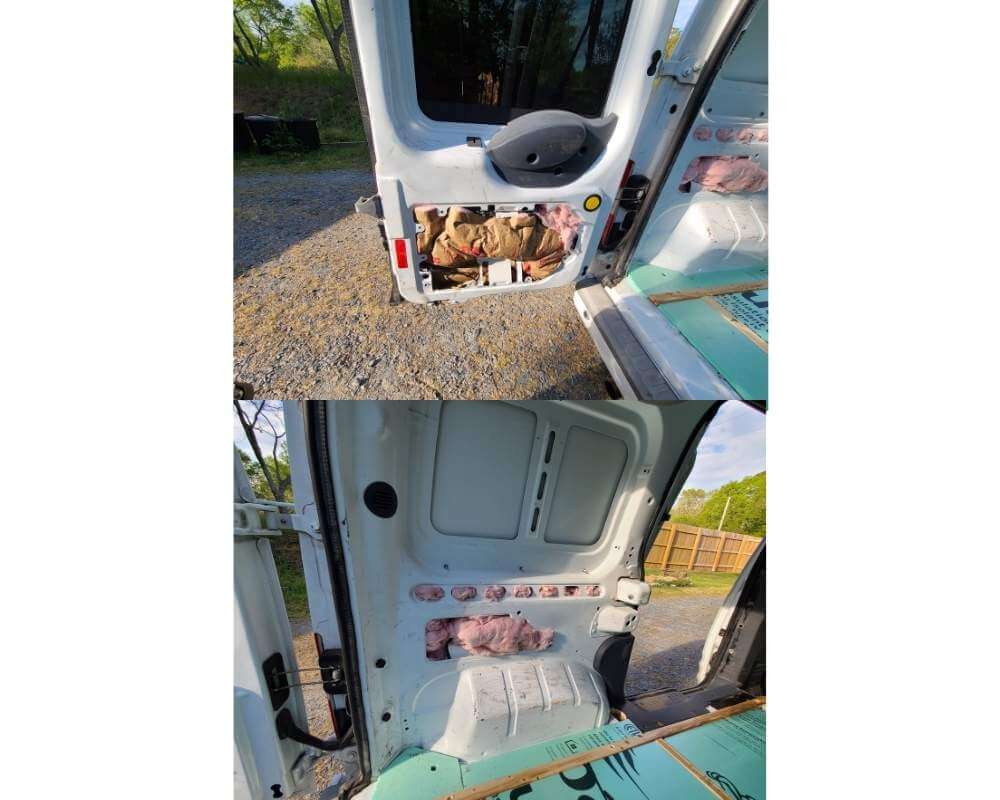
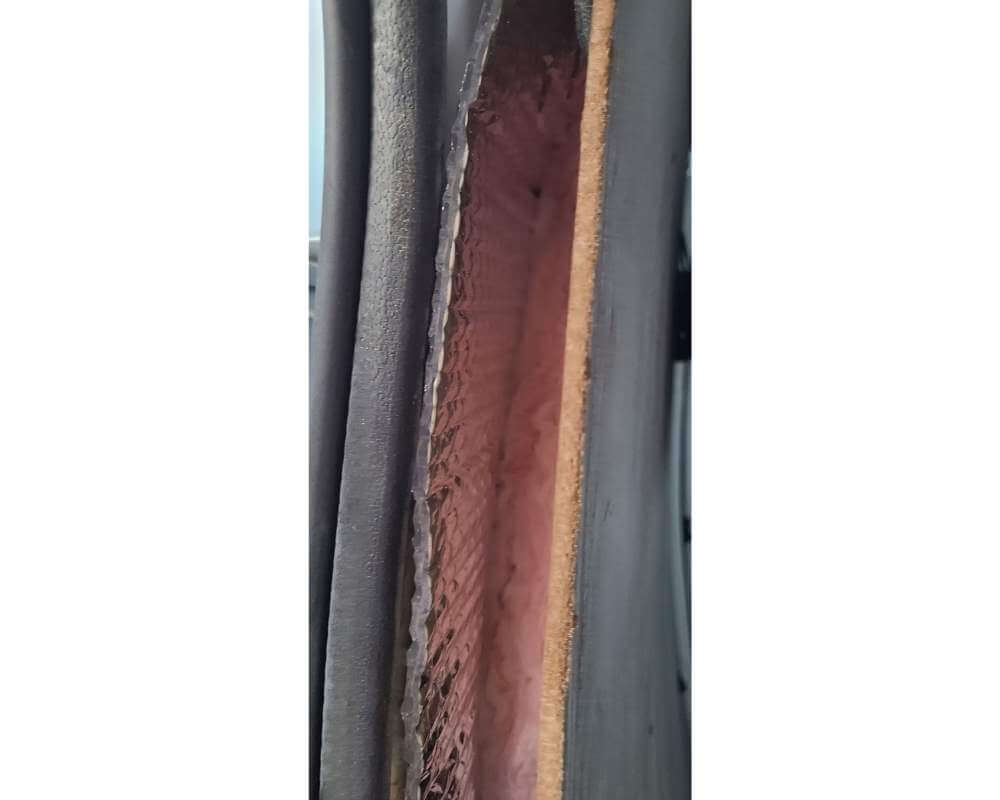
For the insulation used refletix and fiberglass insulation. We stuffed the top portion of the walls, the back doors, and the wheel well area with fiberglass. P.S. wear gloves and possibly goggles when doing this.
If you can help it, don’t use fiberglass insulation! This can cause your van to have extreme moisture problems, which I go over in our post about how to control moisture in a camper van. Learn from my mistake and go with something like sheep’s wool instead.
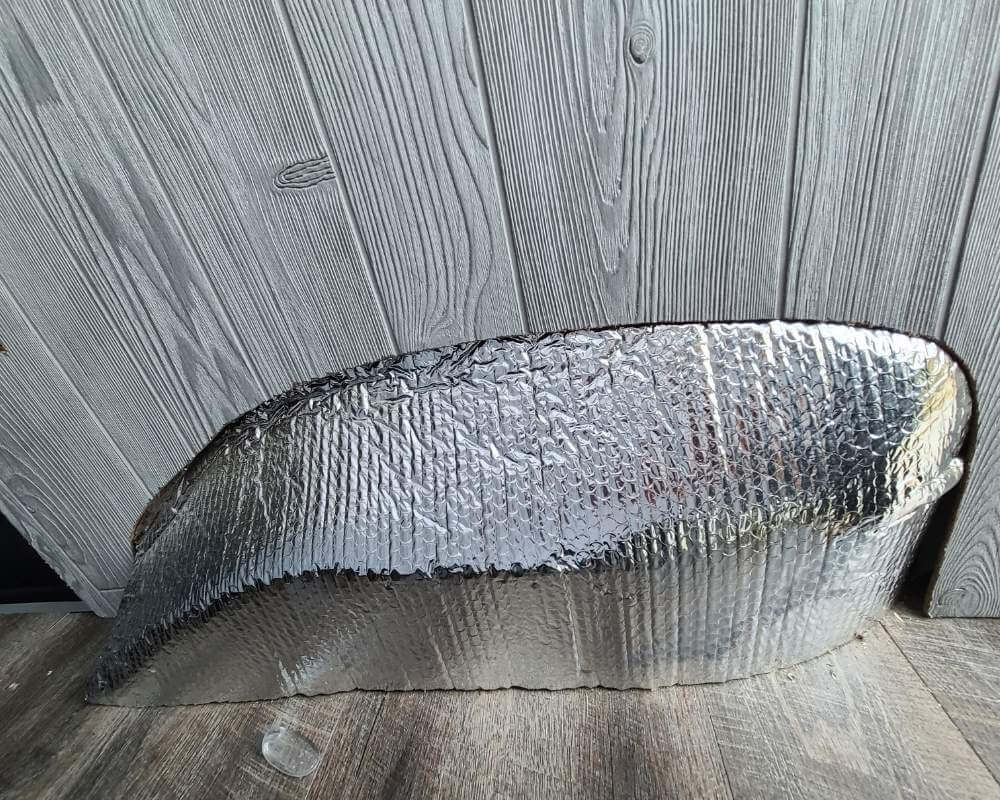
At first, we lined the camper van walls with reflectix and used liquid nails to get it to stick. Well, the reflectix didn’t stick after using liquid nails. We then used M3 adhesive and it worked like a charm.
After a day of letting the adhesive set in we moved on to the wall panelings.
Again, we used the bulletin board paper to get a pattern to use when cutting the paneling. The wheel well and the ceiling are the two main things we needed to trace around. It may seem like an unprofessional thing to do, but we made some pretty accurate cuts using the paper.
The fiberglass insulation was put on to the back of the panel and the panel was then screwed onto the side of the van.
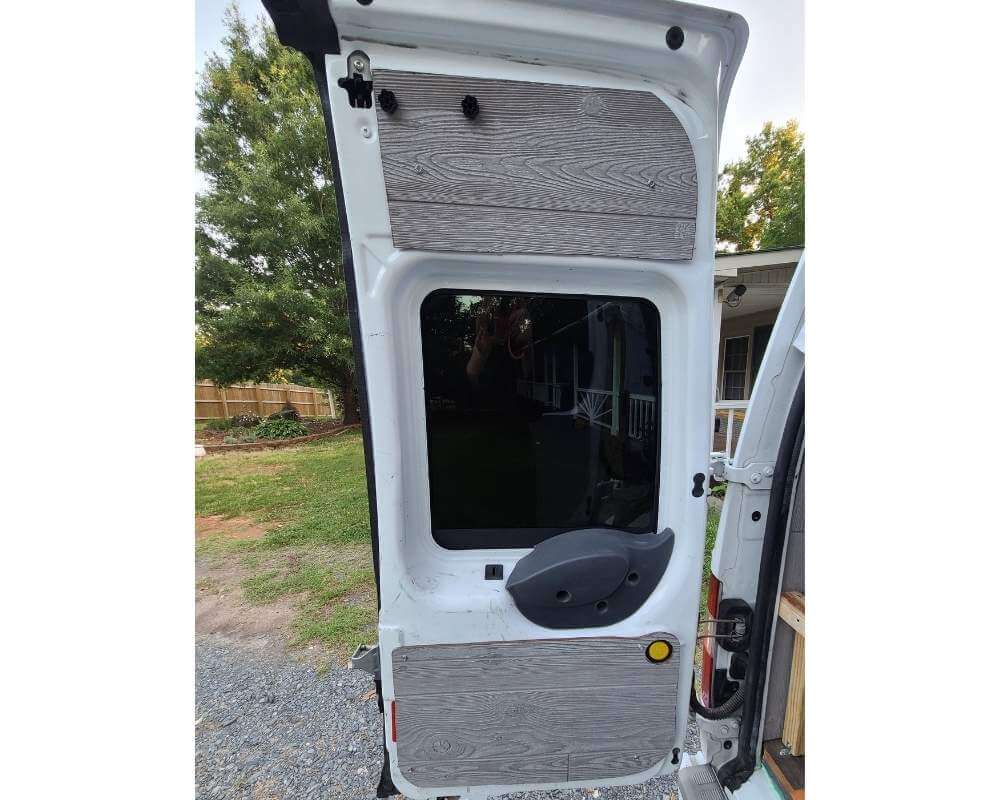
We then screwed the panels into various other areas of the van. We cut smaller pieces for the tops of the doorways on either side of the van. The back doors also have small cuts of the panels in order to bring everything together.
How long it took:
It took about 7 hours over the span of a few days.
The Ceiling
Items needed:
- Tongue and groove $100
- Reflectix $13
- Fibreglass insulation $15
- M3-Adhesive $15
The Build:
We installed the reflectix on the ceiling of our Ford Transit Connect camper van with the M3-Adhesive and let that set in for a few hours.
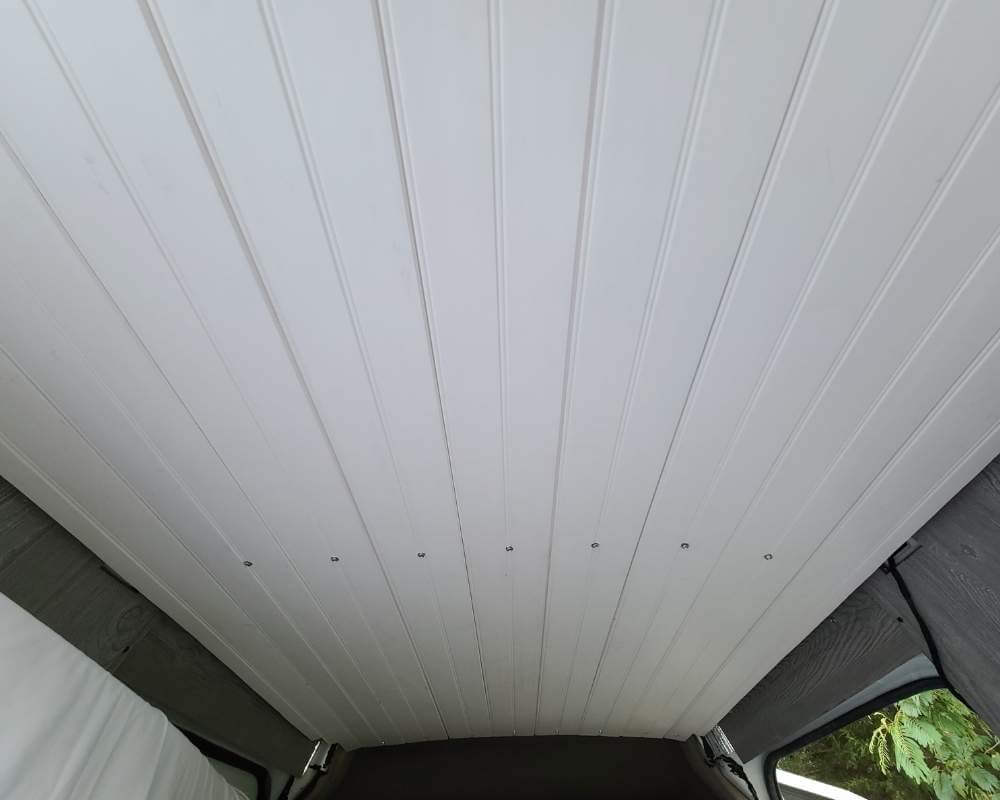
Tongue and groove is what we used for the ceiling. The top of the van was a tad arched so we needed something that would move with the ceiling, tongue and groove worked perfectly.
We had to be extra careful to not drill into the ceiling of the camper van for obvious reasons. We drilled mostly on the metal columns that hung down from the ceiling. The back and the front columns are what we used to fasten the tongue and groove.
There was enough room to pack the fiberglass insulation between the van ceiling and the tongue and grove.
How long it took:
This took around 5 hours total, but we spanned this out over a few days.
The Bed
Items Needed:
- 2x4s $50
- 1x2s $40
- 8 inch full-size memory foam mattress $80
The Build:
The 2x4s are what we used for the legs and the frame.
The slats for the top of the bed were made from the 1x2s.
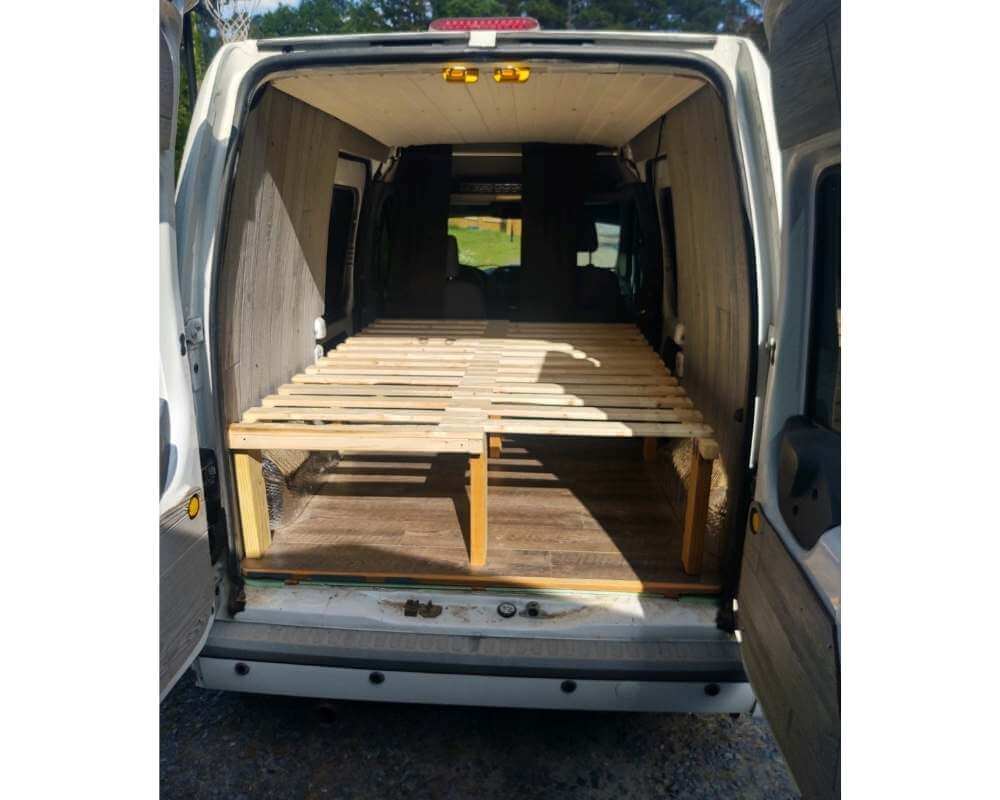
We made the frame and the legs by measuring from behind the seats all the way back to the back doors. Before we measured, Clark had to sit in the driver’s seat and push the seat back to a comfortable position for driving.
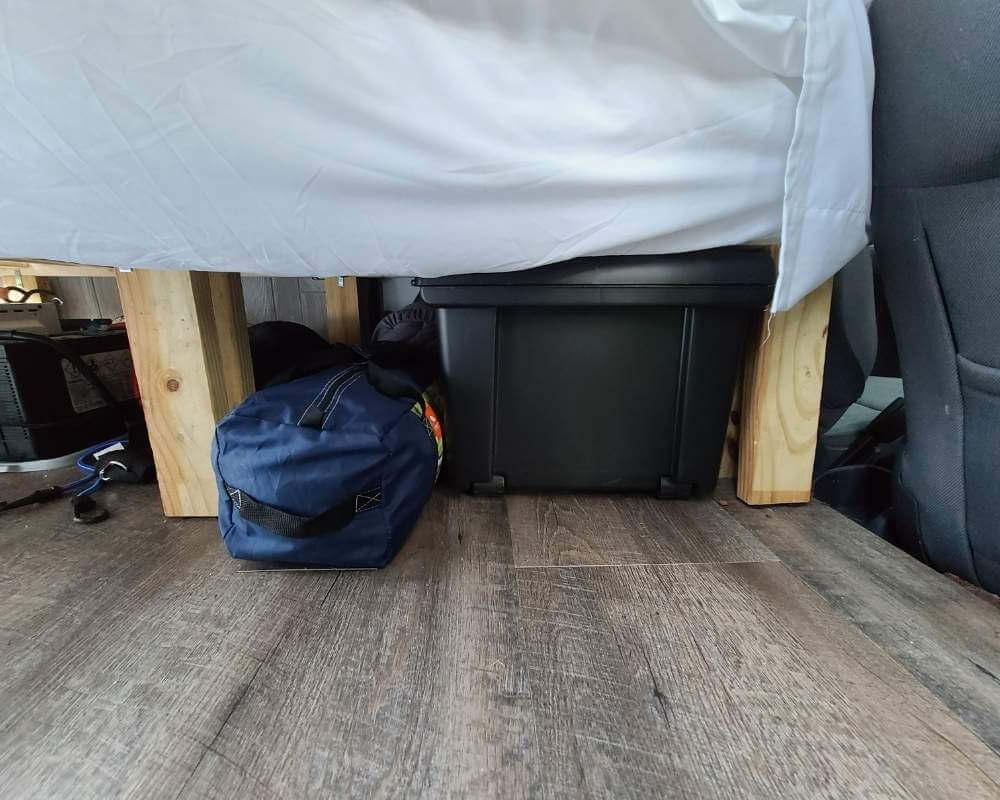
Measuring the height of the bed was a bit tricky. We needed the legs tall enough to fit a few good-sized totes underneath, and we needed it short enough to have enough headspace at the top. The bed ended up being 11 inches off the ground.
Interesting tip: most campervans have mold problems with the bedding. it’s better to have slats for the mattress to sit on top of. This allows for better air circulation. If this still doesn’t work for you, consider installing fans underneath the mattress to keep things dry.
If you would like a more detailed slat bed frame build you can read about it more in detail here.
How Long it Took:
This only took about 4 hours and we got it done in one sitting.
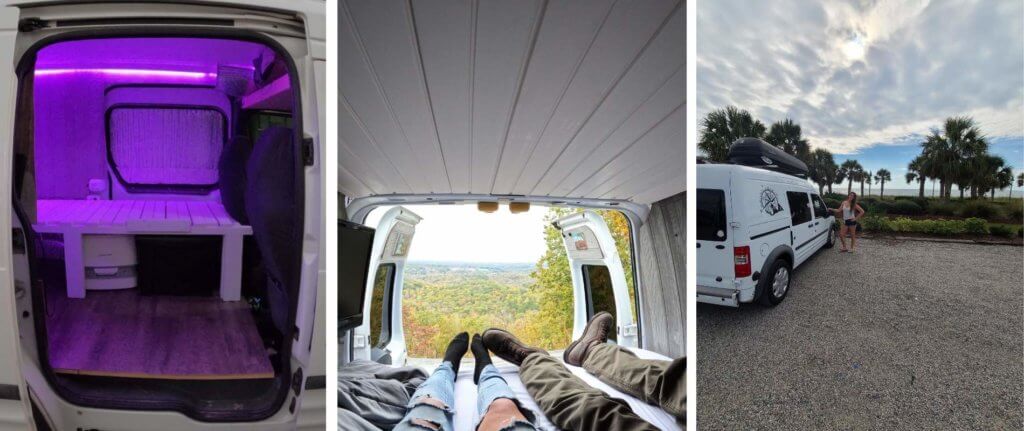
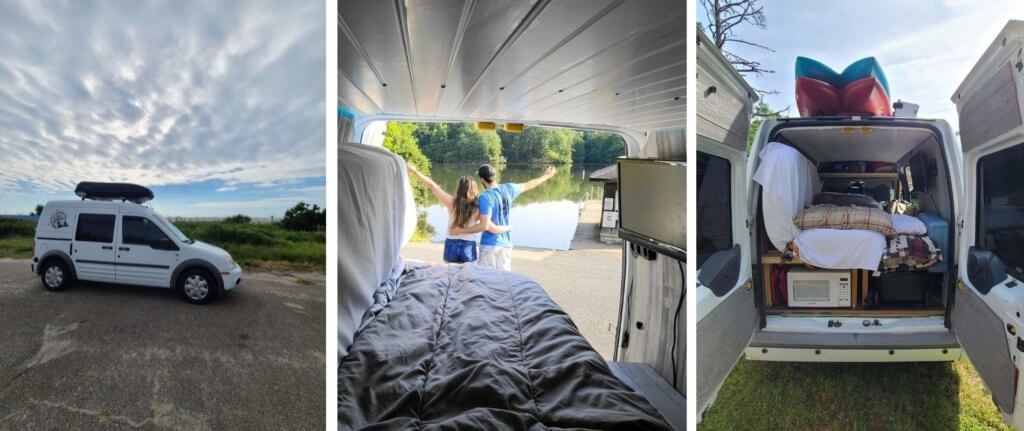
Final Reveal of our Ford Transit Connect high Top Camper Van
Total cost: The total cost was $492. This total reflects anything I put in this post that has a price tag next to it, except for the van itself.
Total time: This was hard to measure because we had to work on the weekends and some during the week. We got it done in about 3 weeks.
Things I wish we had done differently in our van to Campervan Conversion
We are both pretty satisfied with how things turned out with our van. However, there are a few things We wish we did differently
Head Space
The mattress takes up 8 inches of precious headspace. We cannot sit up in the bed as we would like to. That’s okay we were more concerned about comfort than space.
As I said before you cannot stand up in a Ford Transit Connect camper van, even the high-top ones, so there was really no way we could help that issue.
Bigger Van
We knew from the start this wasn’t the best van to convert for two people. Usually, when you see people camping in these vans it’s one person’s living space. In other words, we need to make sure our organizational skills are on point to fit everything we need.
It’s a little difficult taking things in and out of the van in order to slide out the bed. For example, our coolers still don’t fit under the bed, so we have to place them in the front seats when we have the bed pulled out.
Check out these tips for traveling in a small camper van.
Living Space is Outside:
When owning a small converted van you need to expect most of your living tasks to be completed outside of the van. We purchased a 12×12 canopy that we can park the back end of our van into.
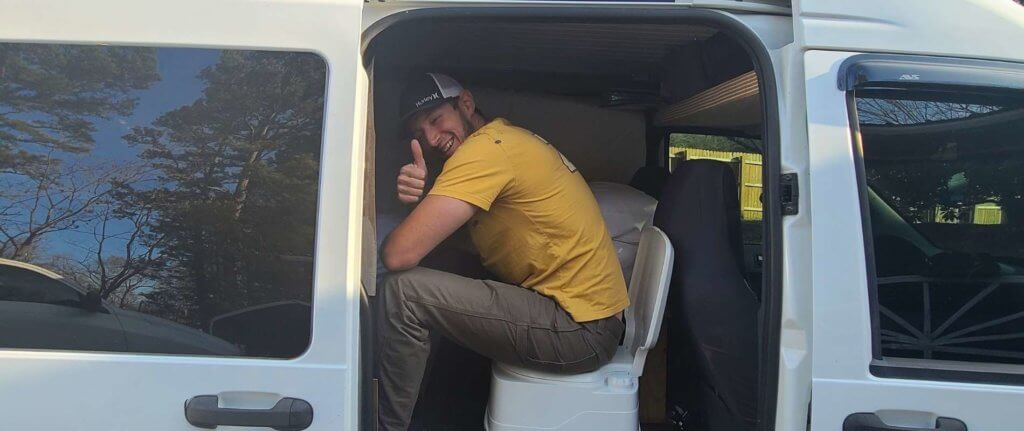
Our campervan kitchen and bathroom are both set up on the outside of our van, as we do not have enough space on the inside.
The downside of this is not all areas will allow a canopy to be set up. For example, it’s probably not a good idea to set up a canopy in the Walmart parking lot or in a parking lot for a trailhead.
Check out how to find free camping across America.
What We will be Fixing in the future
Here are a few things we want to fix in our Ford Transit Connect camper van.
Storage
We have plenty of storage for things like clothing, dishes, and food. However everything is not easily accessible, we will be fixing this by making an overhead storage compartment above the driver and passenger seats.
Sound System
The sound system is horrible, which is to be expected in an older model vehicle. We will probably be replacing this in the near future.
Insulation
I said something before about using fiberglass and how horrible it was. Well, it’s true! I would not recommend using fiberglass insulation in your Ford Transit Connect camper van because it’s toxic, absorbs moisture, and doesn’t do a great job insulating.
Here are some other options for camper van insulation.
Conclusion
I hope I was as detailed as possible. If you have any questions please feel free to leave a comment. Or read some more posts below!

You really are going to save money that way. Thanks!
Very, very cool! Love how detailed your tutorial is, and I can appreciate the section detailing what you would do differently in the future. Every time I do a DIY, I inevitably see things I could have approached differently after I complete the project. Thank you for sharing your experience!
Yes, we are all human and make mistakes haha. But at least we can learn from them.
I love the way you make the sleeping area so efficient. On the way to a true vacation!
Yes it’s super comfy too! Thank you
I would love to have an old (-ish) TRansit and convert it into something so amazing! The money one can save on accommodation when travelling…
If you travel a lot its totally a money saver.
This is a great article I love how the bed slides in and the panelling on the ceiling. Considering the budget and what it costs for a new van you did a fantastic job…think of all the money you’ll save to upgrade…
Thank you for reading! And yes i feel like we saved a ton of money on this van build.
Very detailed and truly I am in awe of how you did it! My family is lacking the crafty types like that, we can barely put a nail in the wall, LOL. Wishing you great many adventures in this camper!
I’m going to be honest we aren’t the crafty type either. haha we had to put in a ton of research and made many mistakes along the way.
This is a great tutorial!! When I retire I’d love to just travel instead of having a permanent residence. This would be more affordable than an RV.
The gas is definitely more affordable in a van than an RV.
this is fun! my friend converted his van into something like this, we were not able to try it for camping but I find it really cool. I saw his labor of hardwork.
That’s awesome! I would love to see what it looks like.
I think the camper vans are so neat and I love seeing how they are done!
Absolutely!