
So you decided to build a camper van!? There are so many decisions when you start building. You may be wondering where you are going to cook, how you are going to take a shower, or what kind of insulation should you be using?
The researching and planning process is probably the worst part because there are so many opinions out there. You are probably here knowing that insulating your van is one of the first steps to making a van into a home away from home.
A huge controversy in the camper van world is insulation! There are so many different opinions out there about what the best insulation is.
The simplest answer to that question is, the best insulation is the one that works the best for you!
This post may contain affiliate links, which means I’ll receive a commission if you purchase through my links, at no extra cost to you. Please read full disclosure for more information.
First, here are all of the items in a chart that we have decided to talk about in this post.
Hi! Nikole and Clark Stone here. In this post, we are going over all the insulation problems and techniques you could ever dream of. We are here to help you decide what the best insulation is for YOU in YOUR camper van!

Do You Need to Even Put Insulation in Your Camper Van?
First of all, do you even NEED to install insulation in your camper van? YES! It’s very important for you to have a temperature-controlled environment. Insulation in your camper van is especially important in extremely cold or hot environments.
Not only does insulation help with temperature, but also moisture problems. If you have already done your research you don’t need me to tell you that moisture is one of the biggest problems in camper vans. Depending on what type of insulation you go with it can help with those problems.
What to look for Before Purchasing Camper Van Insulation
Before going all-in with the insulation, you should probably know about a few things to look for. Some insulation ‘can really cause you more problems down the road, that’s why you really need to do some research.
Here is a detailed list of things to consider before purchasing insulation for your campervan.
Moisture resistant
As I mentioned previously, the most common complaint about van life is the moisture and the mold that forms. If there is anything at all you can do to prevent mold in your van I would suggest doing it.
Other than insulation you can help prevent mold by setting up your mattress the right way. Your bed and insulation go hand in hand when it comes to preventing moisture.
I would recommend building a slat bed for ultimate airflow to your mattress. This will also help prevent mold problems.
Your camper van flooring can also play a huge part in moisture retention. Installing the right material on your floor can help prevent mold problems.
We haven’t had a problem with our camper van yet, even though we used all the wrong insulation! Yikes! But we used what we could at the time due to budgeting, and somewhat not knowing other options. Learn from our mistakes and start off right, that way you won’t have to backtrack.

Toxicity
Some insulation, like fiberglass insulation, is extremely toxic during installation, and can still be toxic once they are behind your walls (depending on how they are enclosed). Admittedly, this is the option we went with.
Fiberglass, though cheap, can give you glass shards in your skin or go to your lungs when you breathe them in. Many insulations, like the Thinsulate and some sheep’s wool, are coated with chemicals. It really just depends on what you are willing to compromise with.
But you need to take into consideration that “your health is your wealth”. It may be worth your time and investment to wait for more money to purchase healthier insulation for your van. This is especially important considering how small and enclosed your living quarters are.
R-Value
The R in R-value is short for the Resistance to heat. The higher the R-value that you see on the packaging, the greater resistance the insulation is to heat. This is dependent mainly on the thickness of the insulation and several other things.
That means the insulation will help hold heat inside your van if you are trying to keep it warm or it will prevent heat from coming inside your van when you are keeping it cold.
Here are some insulation R-value examples (lowest to highest R-value)
- Loose insulation (includes blown in)
- Insulation batts or rolls
- Spray foam insulation
- Foam board insulation

Cost
If you are in our situation when we first started our van build you are just plain broke. But I urge you to not go with the cheapest options when it comes to insulation. You can go cheaper in other areas of your van build.
Now I’m not saying go with the most expensive option, because it’s really not the best option out there. You can still compromise a little. Go with the cheapest and HEALTHIEST option.
You can purchase 3m Thinsulate but it can be fairly costly, around $150 for a 20 ft long roll compared to fiberglass which is around $20 for a 30 Ft roll. That is a HUGE difference in money, and to be quite honest neither option is all that safe for your living environment. That’s what we are talking about next, so keep reading.
What Kinds of Insulation Can You Use in a Camper Van?
This is probably why you decided to even visit this post, to figure out which campervan insulation will work best for your van life. Here it is, all the possible insulation you can put in your campervan, along with pros and cons for each type of insulation.
Refletix
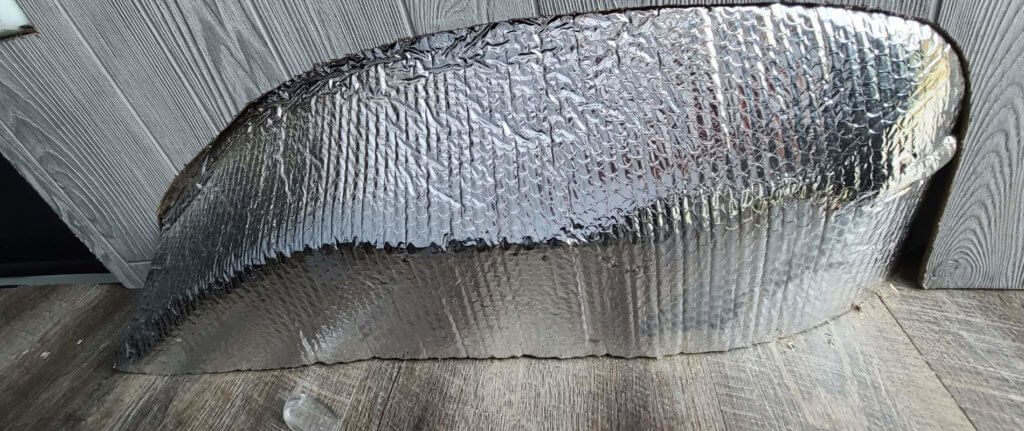
One of the biggest arguments for insulation is whether or not to use Reflectix. It really depends on if you believe it works or not.
Some vanlifers claim you NEED a vapor barrier (in this case Refletix can be used as that barrier) and some claim that you don’t need a vapor barrier. Yes, I know this can get a bit confusing.
First of all, what is a vapor barrier? A vapor barrier helps prevent moisture build-up on the van walls, ceilings, or floorings. Which you might say is FAIRLY important when it comes to insulation.
As we all know, if you have an enclosed item (such as your campervan) that is cold on the inside, but it’s hot on the outside this will cause the walls of your van to sweat. This is where you would start to notice mold in your campervan, and it’s not fun trying to get it out. So it’s better to prevent it in the first place. This is where installing the Reflectix comes into play. By placing them directly on the walls BEHIND your insulation it will help deflect that moisture and radiant heat.
Some vanlifers argue that if you install the Reflectix the wrong way then it’s completely useless. Check out this video I found on Youtube, they have an awesome way of explaining the process. Quite honestly I could go on and on about how this works, and come to the same conclusion of I’m not 100% sure that it actually works.
We haven’t experienced mold or moisture build-up in our campervan yet, and we use the reflectix behind the insulation in our walls. So maybe that’s why we don’t have a mold problem? Who knows for sure!

Pros
- Can reflect moisture and heat with proper instalation
- Cheap
- Possibly help with mold problems
Cons
- Controversy on whether it truly works
- Has to be installed just right

Polyisocyanurate (Polyiso) Foam Board
Foam board has one of the highest R-values in the insulation industry. I wouldn’t recommend using this except for maybe on the floors. The reason is that you need exact cuts, and you really can’t stuff in the extra gaps that may occur, allowing for cold or hot air to come through the van.

Pros
- Highest R-value
- Perfect for flooring
Cons
- Not convenient
- Requires exact cuts
- Has chemicals that could possibly be toxic
Spray foam
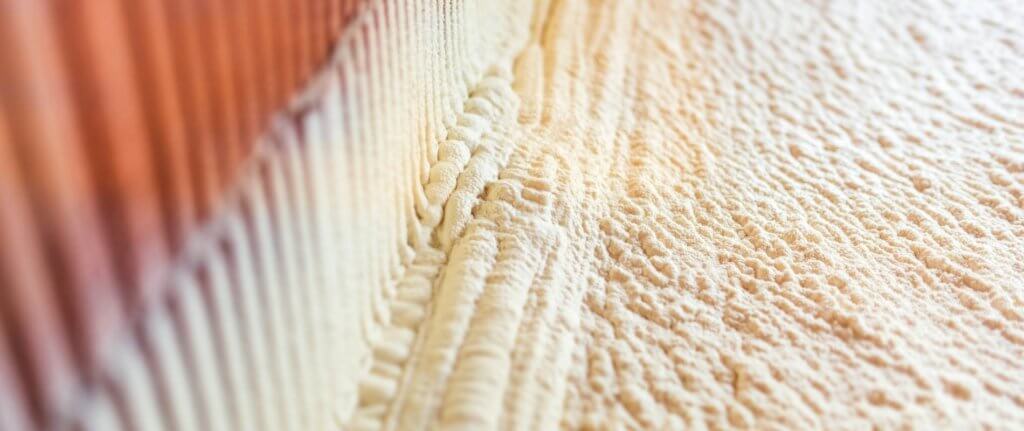
Spray foam insulation is where someone comes in with a sprayer and sprays the insulation in your van where you want it.
Spray foam insulation also has a great R-value but is not recommended to put in your van. For one, you usually need to hire someone to come and do it for you, unless you have all the tools necessary and you’re sure you won’t make a mess of it.
Have you noticed there are pockets on your van’s metal walls? Those are for moisture. When you spray every inch of your van with this it can cover the “drain holes” in your van so much that it will not allow much room for your walls to breathe. The water will pool up in these pockets and cause a moisture problem in your van.
Also, if you ever want to remove the spray insulation, it’s nearly impossible to scrape off the walls.
Pros
- Great R-value
Cons
- Hard to remove
- Not water resistant
- Not breathable
- Messy instalation process
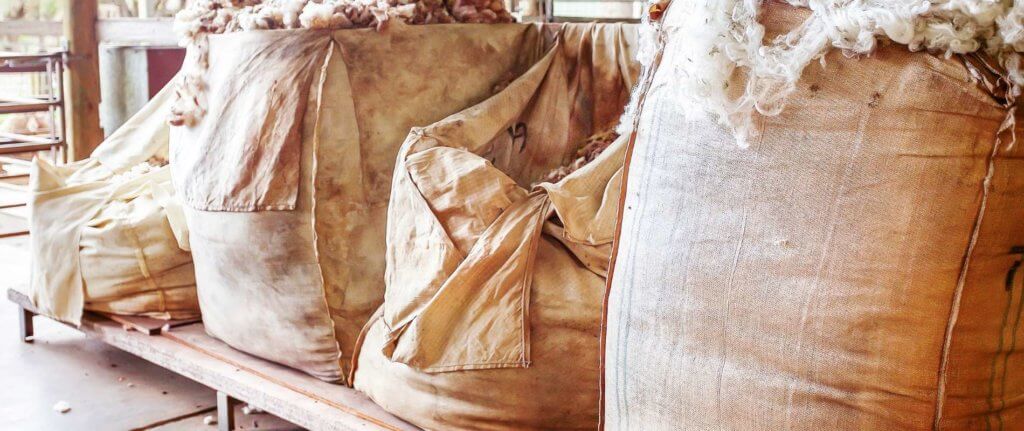
Sheeps Wool

Sheep’s wool is THE insulation to have for your campervan, and it doesn’t come at a horrible price range either. It’s for the most part chemically safe and environmentally friendly.
The first great thing about sheep wool insulation is the moisture resistance. It’s honestly cool how it is with moisture. Sheep’s wool collects moisture and releases it back into the air, which makes it the ultimate insulation for combating mold.
Personally, I love Havelock Wool for insulation, and I will be buying from them in the future. They not only cater to campervan specific lifestyles, but they provide so much information about their product. No, I’m not earning commission from them, yet, but I love their product so much that I wanted to share it with you.
The only downside to this product is the possible bug infestations. I’ve heard of a few people complaining about this problem, however, and Havelock claims to have dealt with the issue by including boric acid in their insulation to repel insects.
I’m also not sure how the company says they have a high R-value. When I looked it up the R-value is only 6 or 7 which is not very resistant to heat. They claim, however, that because the product wicks away moisture it improves the R-value, which makes some sense.
Pros
- Safest option/ non-toxic
- Environmentally friendly
- Wicks away moisture
- Combats mold
- Fairly cheap $150 for 100 Sq Ft
- Noise reducing
- Flame resistant
Cons
- Possible bug infestation
- Some brands still have some chemicals in them

Denim insulation
Denim Insulation is created from recycled denim.
I’m not even going to go over denim insulation in detail, because there were so many people that were against using it. It retains the most moisture out of any insulation I researched, and that makes it a bad fit for any campervan.
Pros
- Uses recycled materials
Cons
- Retains too much moisture
- Causes mold problems
3M Thinsulate
3M Thinsulate is my second favorite to the sheep wool insulation. Only because of the price. Thinsulate is so expensive, and yet I see so many vanlifers installing it.
To my understanding Thinsulate provides mostly all of the same benefits as wool does, except it has more chemicals than wool. I’m really not sure why you would spend a ton of money on this if the wool is so much better and cheaper unless you are really trying to avoid the bug infestation.

Pros
- Sound absorbing
- Water resistant
- Can double up on R-value
- Great reviews!
Cons
- Expensive
- Too many chemicals
Fiber Glass Insulation
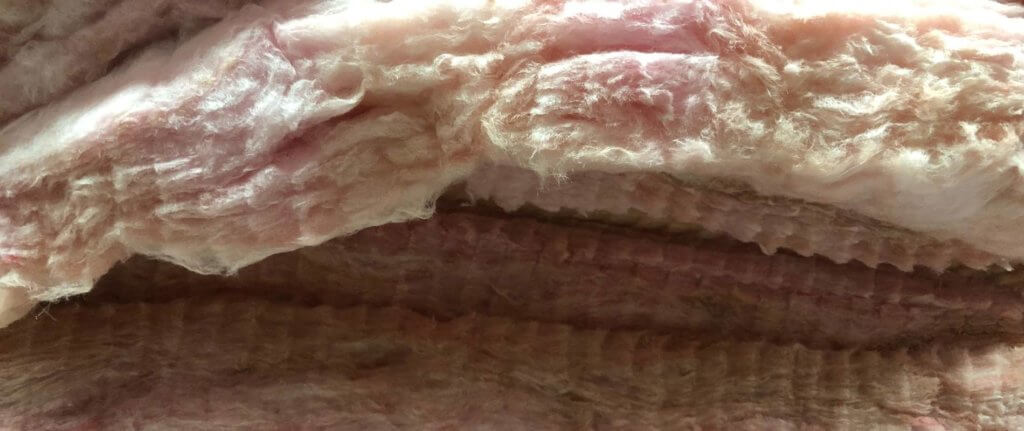
We used mostly fiberglass insulation in our campervan, But I wish we could change this. Even though fiberglass was one of the cheapest options, you may be compromising your health.
When handling this insulation you can get shards of glass in your skin if you don’t wear the proper clothing and you can even inhale it! Yikes! Even after this insulation is put up you still run the risk of inhaling hazardous material into your lungs. This makes it a hard pass for me. I cannot wait till our next van build so we can install the right kind of insulation.
On top of the toxicity of fiberglass, the water absorption is ridiculous, making it the prime environment for mold growth.
Pros
- High R-value
- Cheap
Cons
- Toxic particles
- Wear gear while you install
- Absorbs too much moisture
What IS the Best Camper Van Insulation?
I bet you still are wondering what the best insulation is for your van. Well, that’s totally up to you. Any amount of insulation will help improve your campervan. It all depends on whether you care about the toxicity, price, and installation process.
Personally, I will be installing the sheep’s wool insulation in my next van build. It has an okay price range considering all that it has to offer. I won’t have to compromise my well-being for a lower price. All-in-all sheep’s wool offers the biggest bang for your buck!
What is the Best Way to Insulate a Campervan?
Most decide to install the same type of insulation on the walls, floors, and ceiling. That is the easiest approach, as it takes out all of the guesswork of what type of insulation should you put where.
According to most stores like Lowes or Home depot, this is how your insulation should be set up in your home, and I’m assuming it’s the same for your campervan.
- Attics or Campervan ceilings need the most R-value in insulation
- Floors and walls in your campervan need less R-value in insulation
- In some colder climates floors will need more R-value than the walls
Regardless of how anyone else has done their insulation, here is how we installed ours and how we wished we did it differently (because it doesn’t seem to be working well)
Walls- on the walls of our campervan we stuffed some of the open holes with fiberglass and put Reflectix directly on the metal walls. We then put up the boarded walls and stuffed fiberglass insulation between the boards and the reflectix.
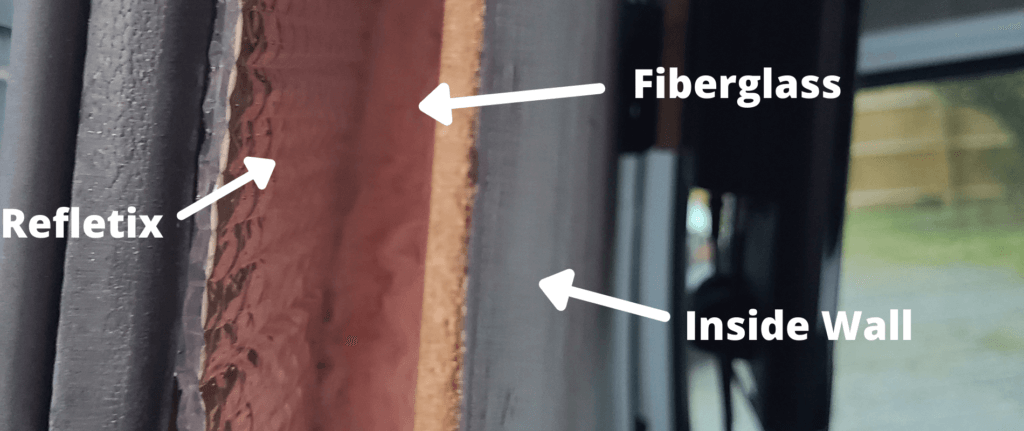
I regret using the fiberglass insulation because of the toxicity. Quite honestly we didn’t know HOW toxic it was and didn’t use any protective gear. But hey we survived without any damage to our skin or lungs.
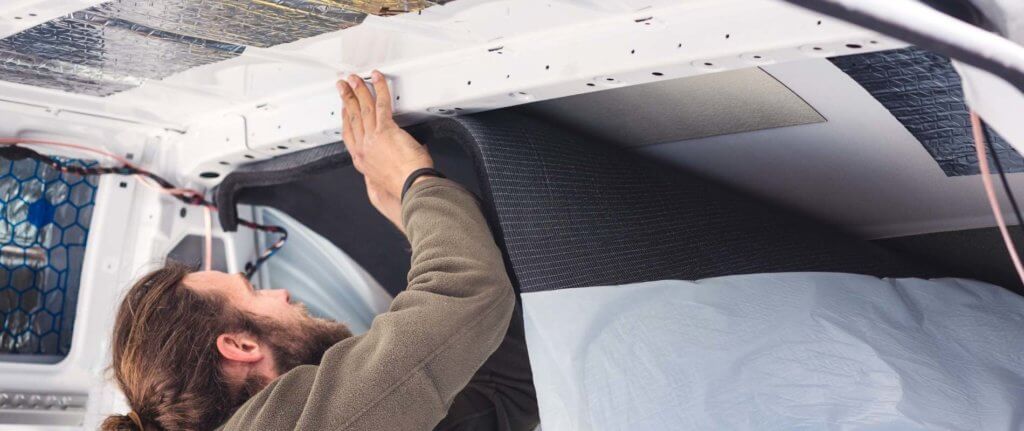
Ceilings- We installed the Reflectix closest to the metal on the ceiling then we installed one half of the ceiling with tongue and groove. We then stuffed more fiberglass insulation above the tongue and grove.
Floor- The floor is the only place we used different insulation because we thought it should have a higher R-value than the rest of the van. We used the foam board. we cut it into sections and placed them in between the base of our floor. The main thing we did wrong was not taping it. Apparently, you are supposed to tape the insulation together to create a vapor barrier. We do notice a huge difference because our floors are always super cold in the winter or super hot in the summer.
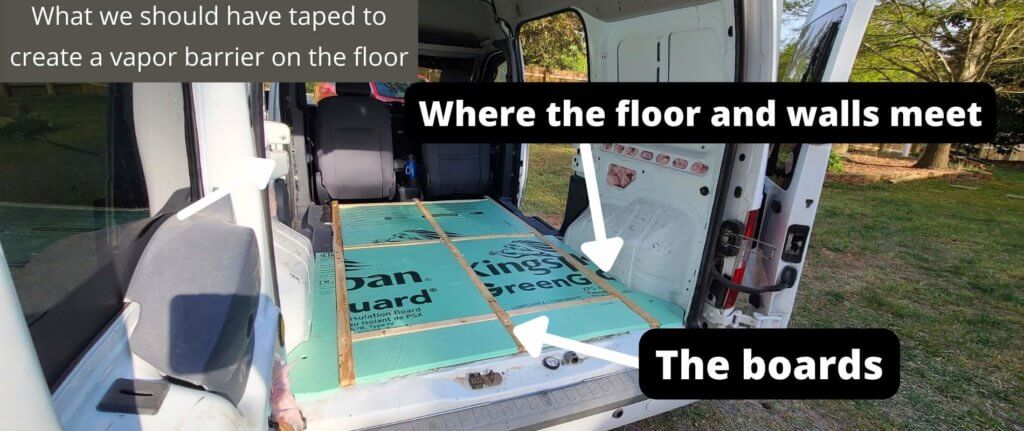
When installing the floor insulation you need to ensure that everything is taped together including where the walls and the floors meet.
Dividers- We currently do not have any dividers in our van. Typically if you have a big van you want to have some sort of divider between the cab of your van and your living quarters. I’ve heard this makes all the difference. The front windows let in a lot of heat or cold.
If anything we will cover the front window with a window visor, but this really doesn’t contribute much insulation. We also have a van that’s fairly small and isn’t that hard to heat or cool.
Doors and windows- If you are still struggling to keep your van temperature-controlled I would suggest covering your windows with reflectix. This really helps maintain temperature as the temperature from outside comes through the windows easily.
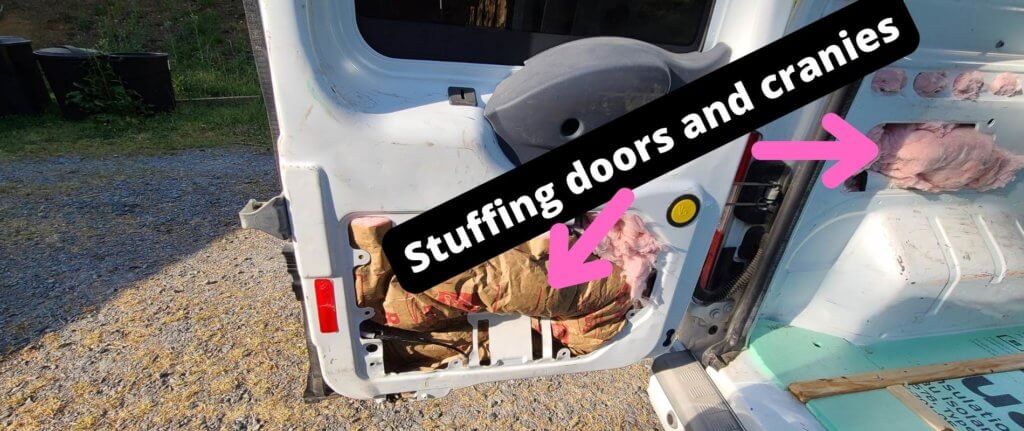
When we were first installing insulation in our campervan we stuffed the doors with fiberglass. We took apart some of the doors just so we could stuff it. It helps to try and cover every area that you can in your van.

You are very thorough and helpful, thank you!
Super helpful. We have actually been looking & this broke everything down for us. Thank you.
So glad you found it helpful.
Good comprehensive overview for insulating a camper van. Thanks for putting it together in one place!
You are so welcome!