
With every camper van build are those gorgeous hardwood or vinyl floors everyone loves. Imagine the furniture, the walls, and the ceiling being pulled together by the look and colors of your floor.
In this post, we aren’t talking about those gorgeous brown and tan floors; no, we are talking about the camper van subfloor. Camper van subflooring is a necessary layer of your build.
Without a subfloor, you will not have an even floor to place your storage and furniture. You also can’t place your gorgeous wood planks directly onto the metal base of your camper van, mainly due to the ridges at the bottom of most vans.
Here are several reasons why you NEED subflooring in your camper van:
- Insulate and soundproof
- Create an even floor surface for your camper van accessories
- Provide an even surface for your flooring material
What is Camper Van Subflooring?
A camper van subfloor is located directly underneath your flooring material (flooring material could be anything from vinyl planks to linoleum).
Camper van subflooring creates a foundation for your entire van build and should be the first task you complete.
Your subfloor will consist of insulation, furring strips, and a big piece of plywood to top everything off.
Now you know the why and the what let’s get into the how!
1. Prep and Gut The Back of the Van
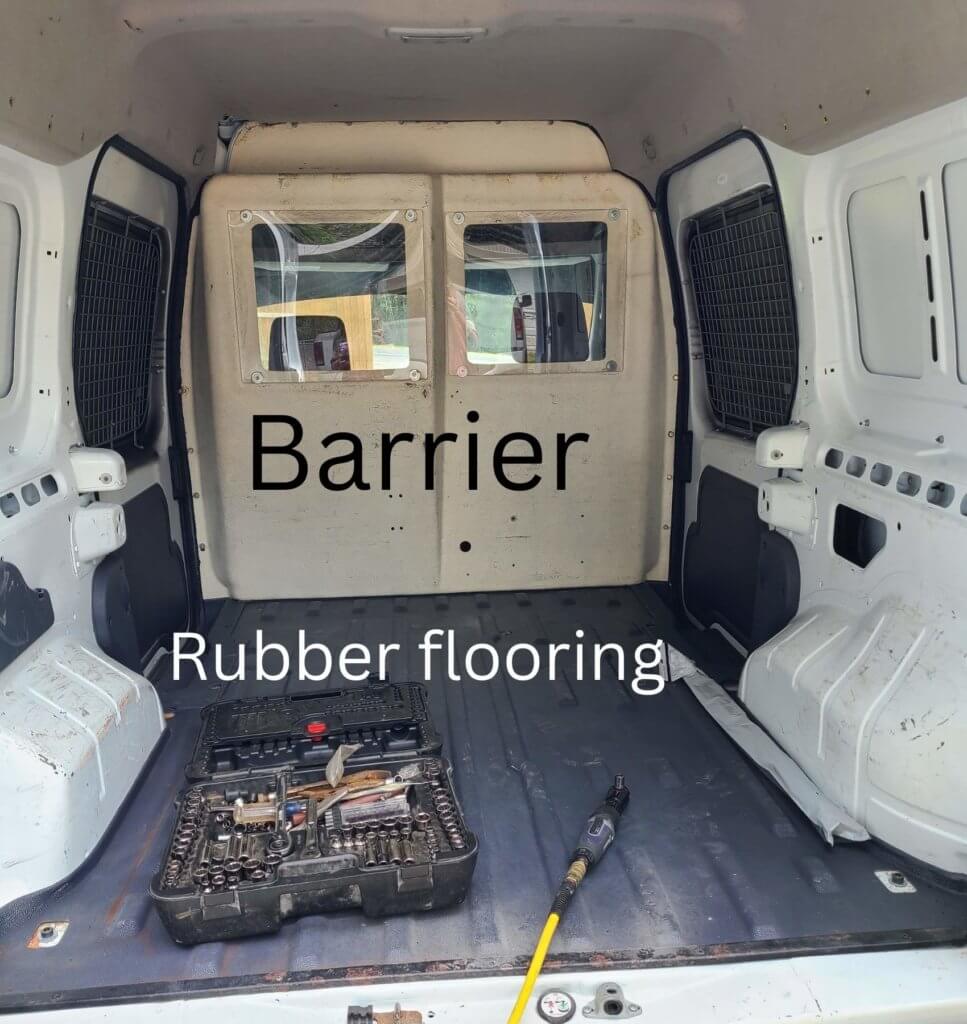
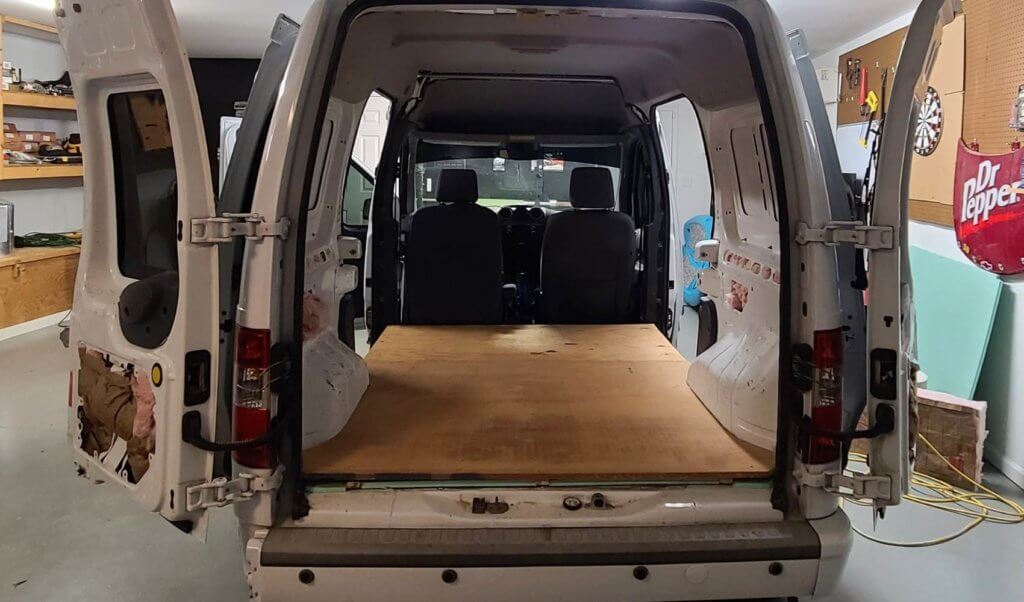
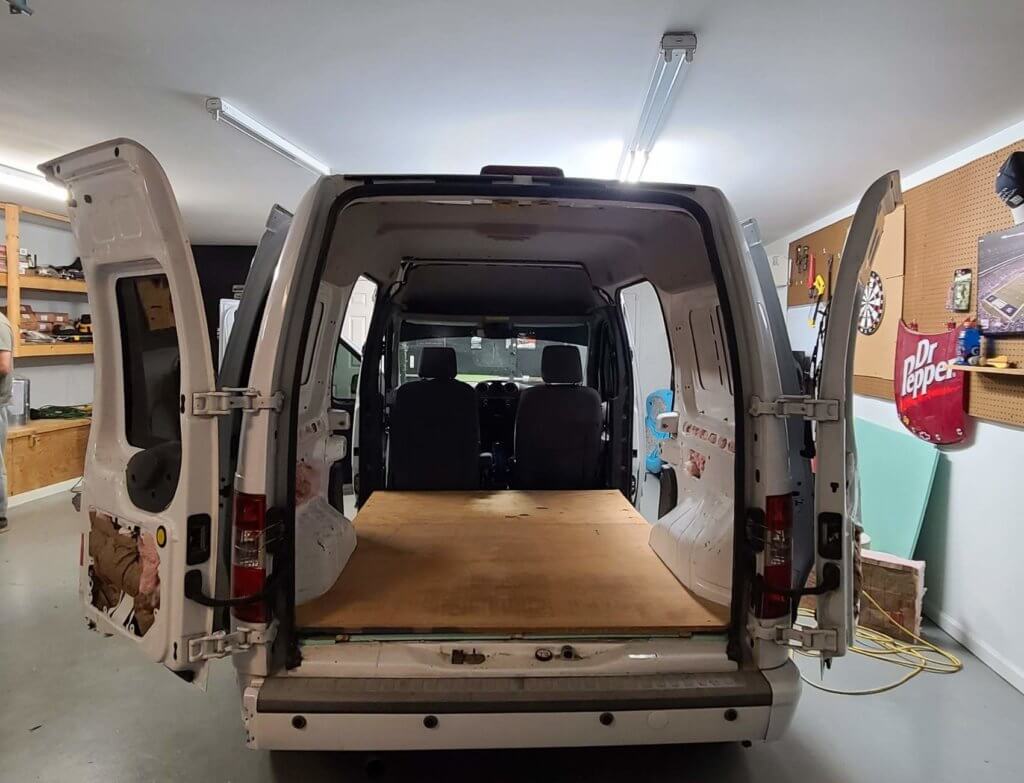
When prepping your camper van, you will want to remove any barriers, existing flooring, and debris.
We had to remove a barrier that cut the front off from the back. There was also rubber padding covering the metal flooring, which we removed.
Removing the rubber from the floor will give you a cleaner surface area to install your subfloor. You can also see if there are any rust issues that need to be dealt with.
2. Clean With Soap And Water
After you have gutted your camper van, the next step is to prep the van floor. You will need to clean the metal floor with soap and water.
If you use soap, you especially want to ensure you wipe up any residue, so your glue adheres to the floor (if you decide to glue your furring strips).
While you are cleaning make note of any rust spots so you can deal with them accordingly.
3. Deal With Rust Spots Right Away

It’s important to deal with any amount of rust before installing your camper van subfloor. Rust will spread like wildfire and cause many problems including eating holes in your living quarters.
To deal with small rust spots scrape them clean and use Rustoleum to fully cover up scratches. Rustoleum comes in a spray can or a paint can and has several different colors to match your van’s interior perfectly.
Make sure the paint dries before you decide to adhere any boards to it.
We skipped this step, unfortunately. After doing hours of research I wish that we would have done this.
Camper vans retain moisture well, especially if you aren’t ventilating or insulating correctly. When you have such a small environment with moisture build-up, any rusted areas you have will spread quickly. It’s important to deal with the rust BEFORE you have a problem.
4. Level the floor With Furring Strips
You may have noticed by now that your van has some groves in the already existing metal floor. You will need to cut out and install some furring strips.
Furring strips are long thin pieces of wood used to set the plywood and cradle the insulation. You can purchase standard 2×2 pieces, but we used 1x2x6 pieces.
You can create furring strips a few ways, but I would recommend the first method listed below.
first Method
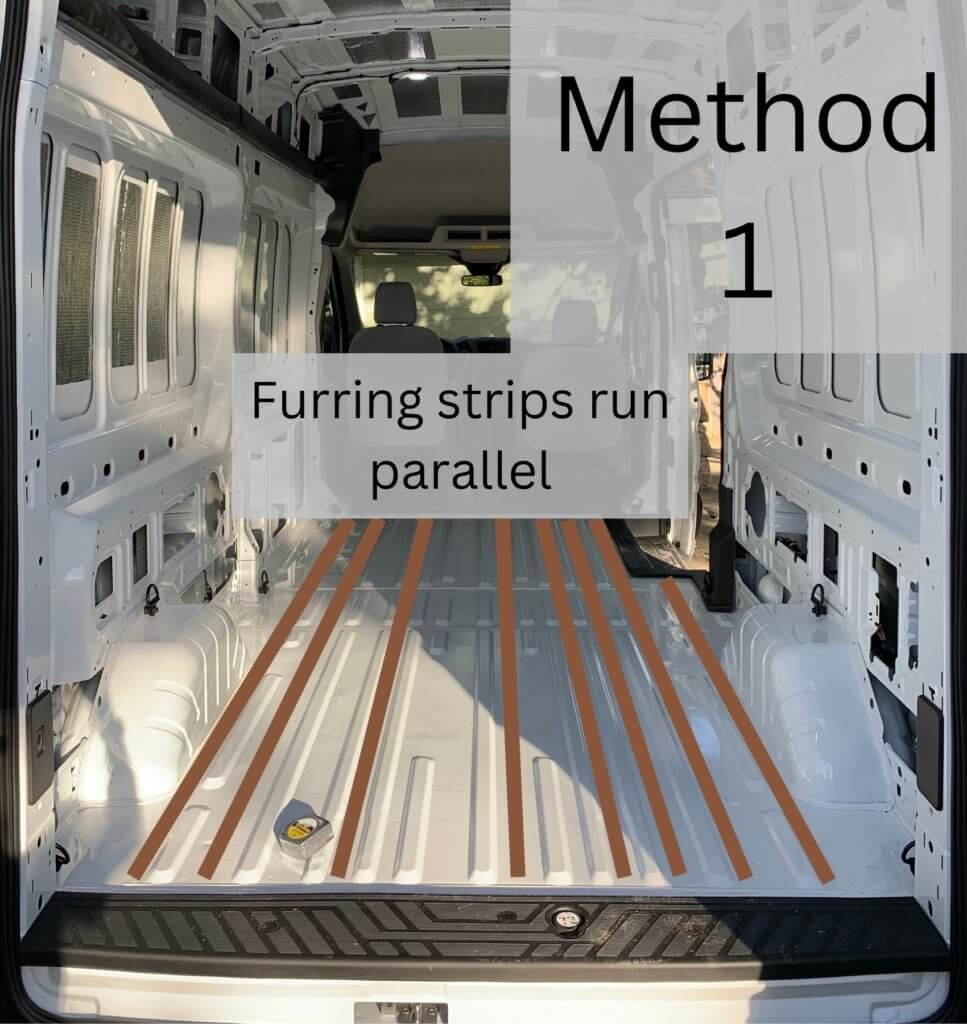
The furring strips are typically placed between those groves in the van and run parallel with the groves.
I love this way better because it saves some headspace and makes more sense for those using sheep’s wool or similar types of insulation designed for stuffing.
Second Method
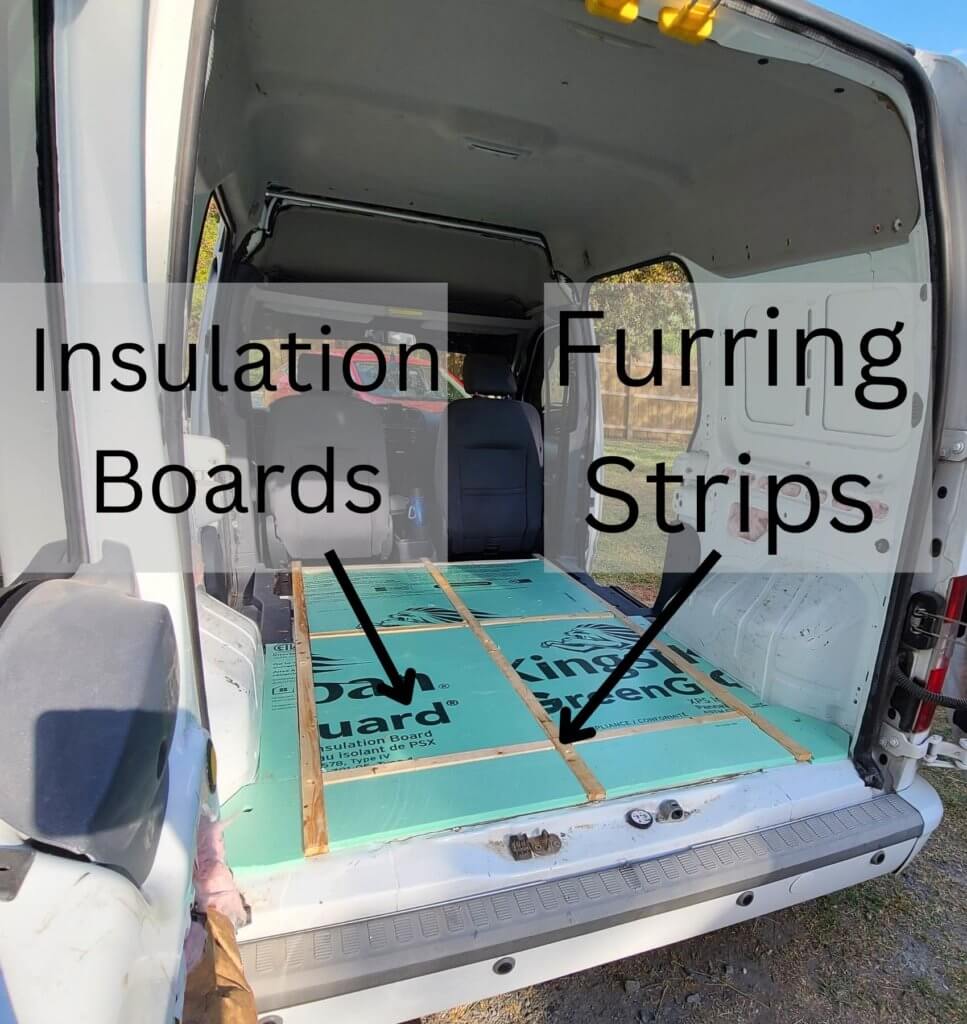
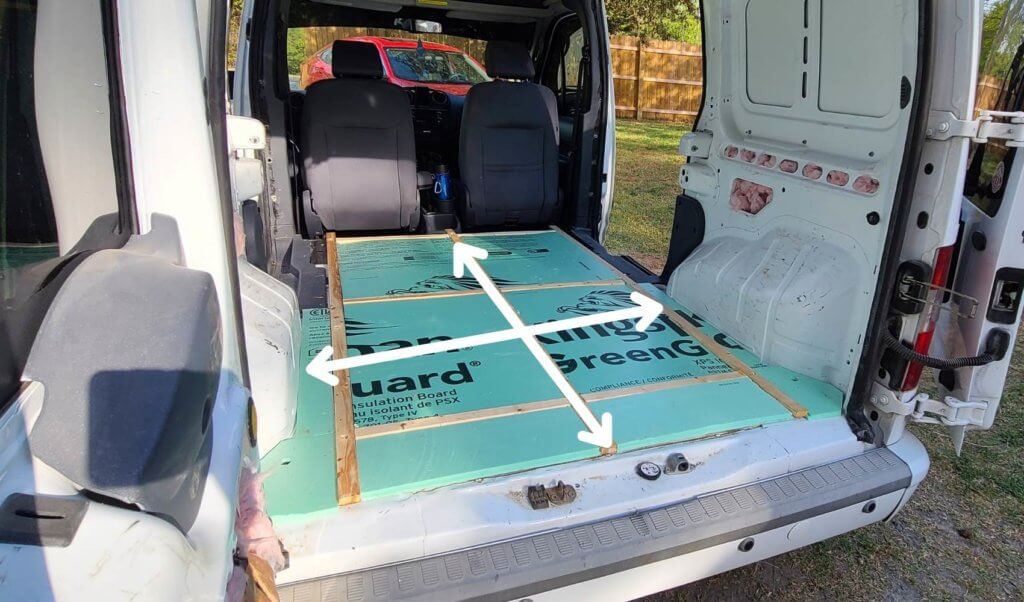
You can create a platform for your van subfloor by placing your furring strips in square portions, as we did. The square portions will work best with the insulation boards we used.
I wish we didn’t use this method because the board sits on top of the metal groves in the van and takes up some headspace. You may think, oh, it’s just a little bit of headspace, but little bits here and there will add up.
Some people glue their furring strips to the bottom of the van floor, but we didn’t find it necessary.
5. Insulate with Wool or Insulation Board
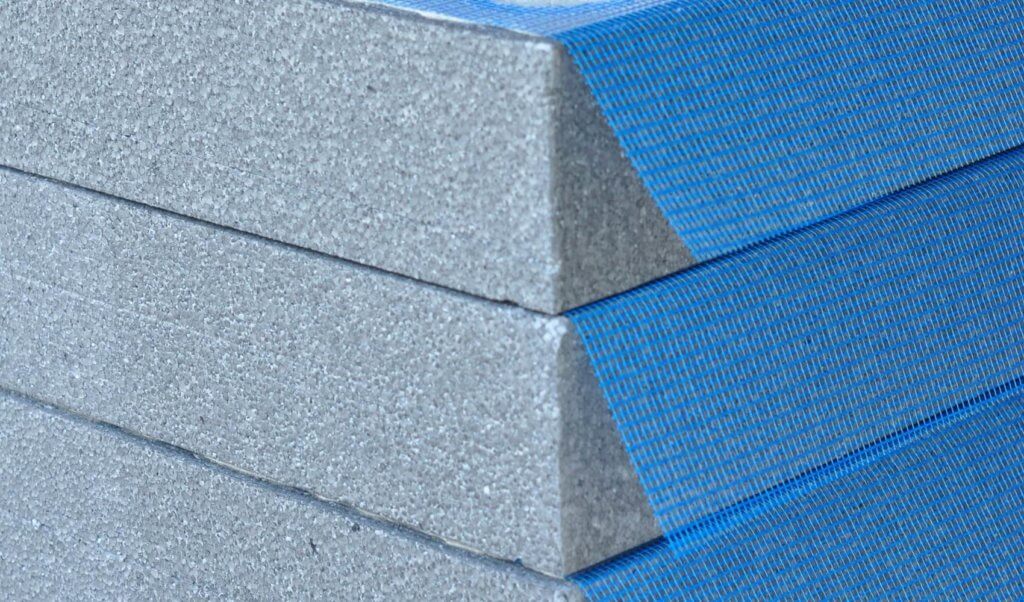
I already touched up a little bit about insulating in the previous step because furring strips and insulation go hand in hand.
If you decide to go with furring strips (I highly recommend you do, so you don’t have to screw your plywood into the bottom of your camper van) then insulation is a must. You really can use whatever kind of insulation you want, but some will do better than others.
Fill all the spaces between the furring strips, and make sure there are no gaps. Check where your furring strips meet the walls and make sure you fill in those gaps.
As long as your furring strips are installed you won’t need to worry about the sturdiness of your insulation. Make sure that you have a decent R-value, something that won’t retain moisture, and something that is non-toxic.
You can find your ideal insulation here.
6. Cut Your 1/2″ or 3/4″ Plywood
Most van lifers use a 1/2″-3/4″ thick plywood as the top part of their camper van subflooring. Plywood is the ideal material for this part of your build because it’s sturdy but not too thick.
We used a 3/4″ thick piece of plywood because that’s what we had laying around the house.
To install it we bought builder’s paper and cut two huge sections out of the roll.
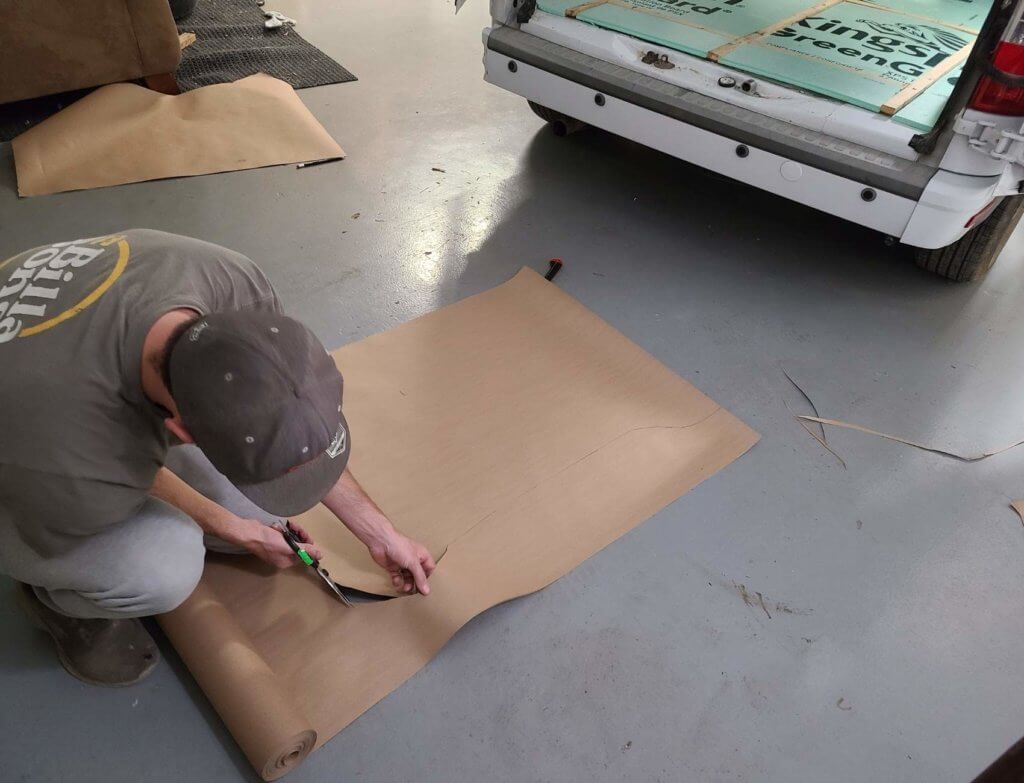
We taped the two sections together so it would cover the whole back of the camper van subfloor area. This does take just a tad bit of guesswork.
Lay the section of paper across the back of the camper van and trace around the van edges. Trace from the seats of your van (where furring strips begin) to the back (where furring strips end). Be aware of tracing back away from door jams to allow your steps to remain uncovered.
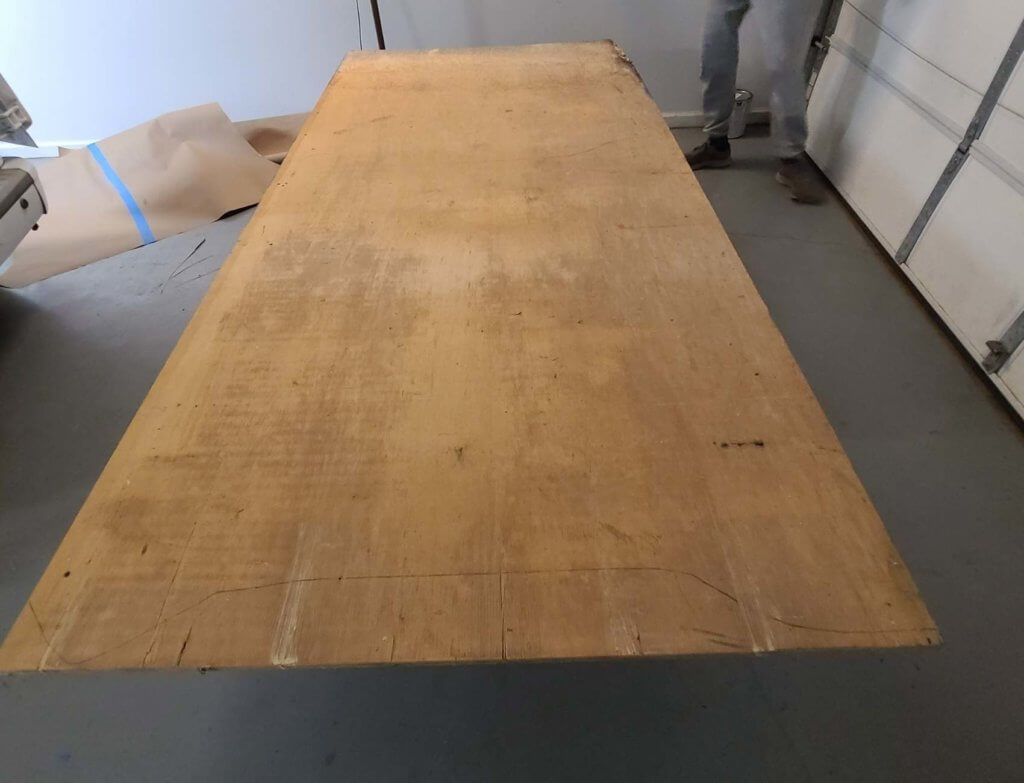
Cut out the area you traced on the paper. Place the cutout paper on top of your plywood and trace on the wood around the paper. (In the picture above you can barely see some of our trace lines on the wood)
We actually divided the plywood into two sections; that way, it would be easier to fit in the back of the van. You can, however, leave the plywood whole.
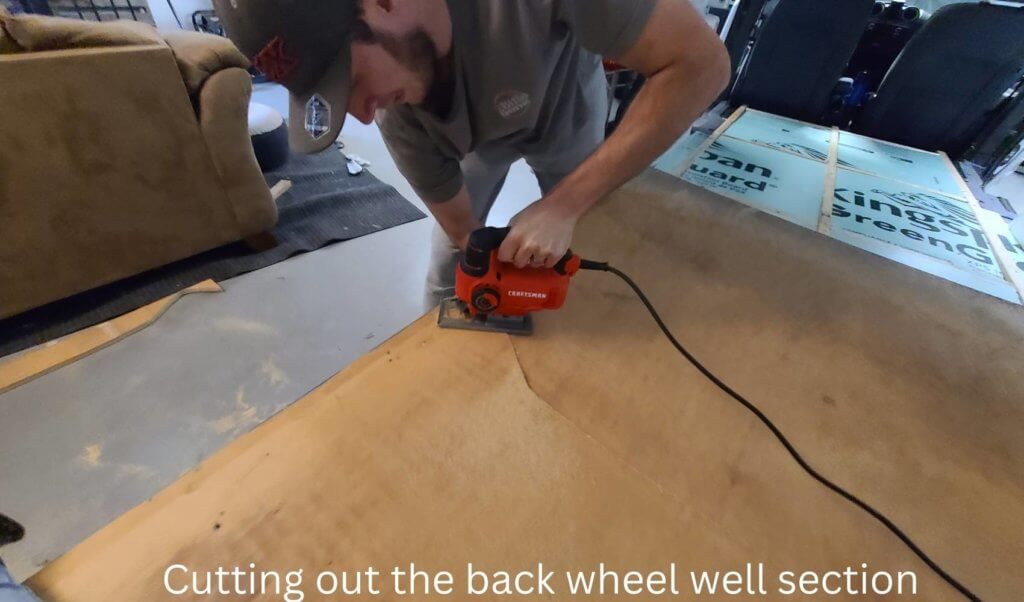
I recommend the paper because the awkward groves and wheel wells that jut out make it impossible to measure the area to cut your plywood.
7. Install The Plywood
We placed glue on top of the furring strips so they would adhere to the plywood.

We also screwed the plywood into the furring strips after everything dried.
8. Install Flooring Material On Camper Van Subfloor
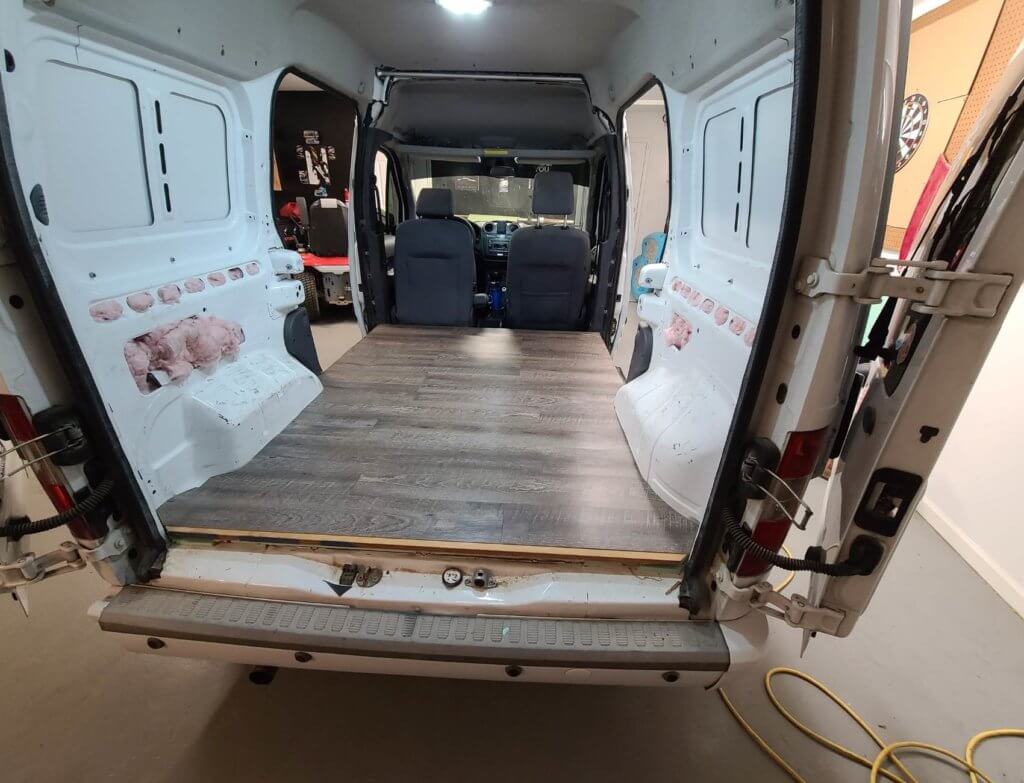
We then installed our peel-and-stick vinyl strips on to our camper van subfloor. We went with this flooring material because it’s what we had lying around the house.
You can save a lot of money by using items from around the house or a friend’s house.
Frequently Asked Questions
Here are some more questions you may have about camper van subflooring.
What Can I Use For Camper Van Subflooring?
Plywood should be used for your camper van subfloor because it doesn’t have to be thick to be durable. Another option is OSB board, but this material isn’t quite as durable as plywood, so you will need to get a thicker piece.
OSB doesn’t adhere as well as plywood, so if you plan to glue your flooring, use plywood.
Should I Insulate My Camper Van Floor?
Insulating your camper van floor is a must if you want a controllable climate to live in. Insulation helps keep the cold or the heat out, depending on what kind of weather you come across.

Great post.
Why thank you love
This is a great step-by-step how-to! Wish I had this article when we did our van conversion! It will definitely be helpful!
Awe well thank you, it’s nice getting the perspective of another vanlifer. 😁
Very informative. Thanks for sharing!
Thanks for reading 😁
Great information about camping. I have never been camping but great to learn about DIY camping.
Thanks for reading